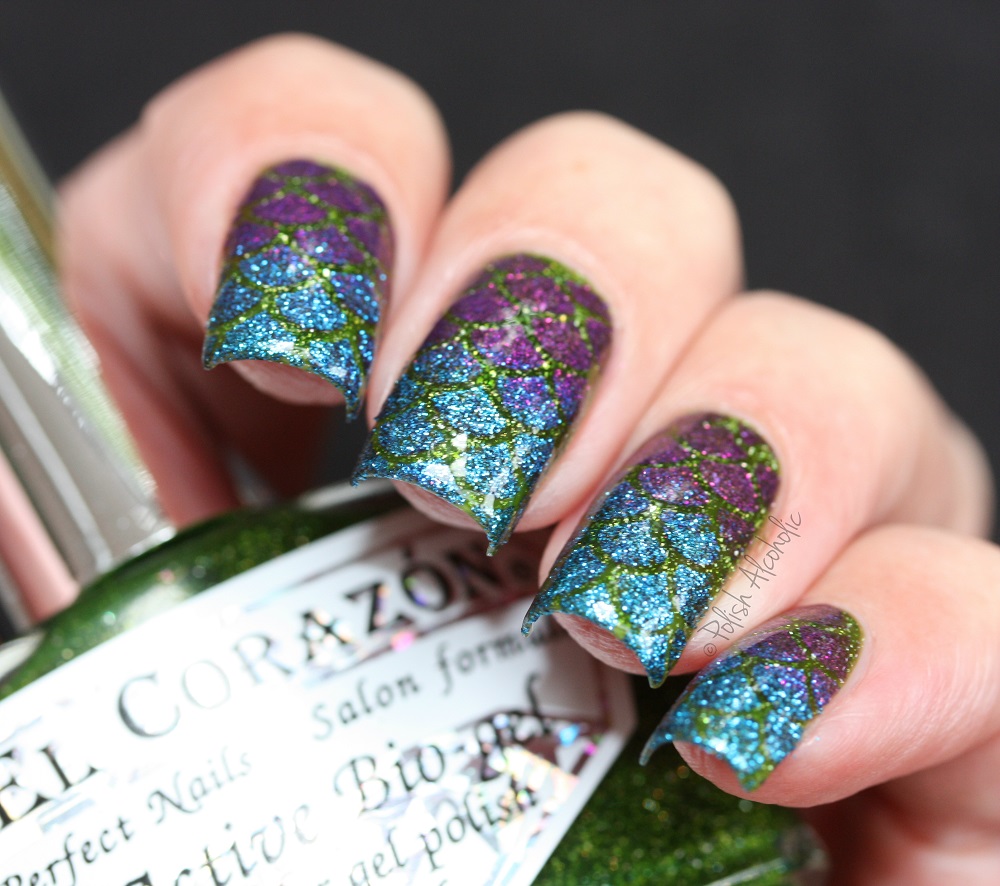
Have you tried nail vinyls yet? They’re so easy to use and gives a mani just a little bit extra. For this mani I started with two coats of Nymph (423/507) by El Corazon and topped it with one coat of fast drying top coat (HK Girl by Glisten & Glow).
The mermaid scale vinyls are from What’s Up Nails. I used a make up sponge to apply the following polishes after I applied the vinyls: 509a, and Magic Attraction (423/554) by El Corazon. One coat of top coat and done! 🙂 El Corazon polishes are currently on sale at Hypnotic Polish! The vinyls can be found here.
Every day I see more and more gorgeous mani’s created with nail vinyls. So I finally decided to order some and give them a go. I started with one coat of Lethal by Llarowe over a black base and topped it with fast drying top coat. Then I used the oval cyclone vinyls by TwinkledT and applied Mark Needs Love Too, also by Llarowe. Top coat and done! 😀 Obviously I need to practice the placement of the vinyls some more but I’m pretty pleased with how these turned out. What do you think of these? do you have any experience with nail vinyls?
TwinkledT nail vinyls are available at their website, in case you’re interested.
I also ordered the heart beat ones and am excited to try them out 🙂
More and more brands are coming up with nail vinyls in the most awesome designs. While browsing at The Nailista Shop the ‘POW! nail stickers’ caught my eye. I decided to create some ‘Pow! Boom! Wow!’ -or whatever you’d like to call it- nail art with them. Here’s how it turned out:Not perfect but I like how these turned out. I started with painting each nail in two different colors of nail polish and topped it with one coat of a fast drying top coat. When that was completely dry I applied the nail vinyls in such a way that the two base colors met in between the two vinyls. Then I applied black nail polish, removed the vinyls and waited for it to dry. Meanwhile I used a dotting tool to add some dots. Finish with top coat and done!
Polishes used:
ANNY: What else (white)
ANNY: Die for high heels (red)
OPI: The IT Color (yellow)
China Glaze: Liquid Leather (black)
I know… Monday’s are usually not the happiest days. But today is an exception because today is such an exciting day!
I’m over the moon excited to be part of the Blog/Insta Fest 2014. For this years event piCture pOlish has teamed up with Linda, the mastermind behind Nail Vinyls. The nail vinyls come in many different shapes and sizes such as chevrons, straights, starburst and even lightning bolts. I received the chevron shaped ones for this project. Of course there is no project without polish! So I also received Twinkle and Peaches n Cream, which look great together. And if that wasn’t enough I also received a gorgeous holographic polish called Grace.
First, let’s take a closer look at the mani that I’ve created with Twinkle and Peaches n Cream by using the nail vinyls: I have used the Nail Vinyls before and absolutely love to work with them. They are very easy to use. I thought that the best way to show you guys how I created my design is to make a video tutorial 😀 On a side note… for the nails of my middle finger and pinky I’ve used Peaches n Cream as my base color and for my index and ring Grace.
How To
Apply a base coat to protect your nails.
Apply your base color. I used two coats of Peaches n Cream.
Apply one coat of a fast drying top coat or wait for your base color to be completely dry. This will prevent lifting the base color up when removing the nail vinyls. I used one coat of Insta-Dri by Sally Hansen.
Apply the nail vinyls by using tweezers and made sure to push them down (mind the edges of your nails!). I prefer applying them with tweezers because when you do it with your fingers (which is totally possible) the vinyls can get oily and might not stick well on the nails.
Once your nail vinyls are in place, apply the second color over the entire nail (not too thick, nor too thin). I used one coat of Twinkle.
While the second color is still wet, use tweezers to gently remove the nail vinyls.
Time to clean up! I used a small angled eye liner brush and some acetone.
When your design is dry, use a top coat for a shiny and long lasting finish. I first used Sally Hansen’s Insta Dri and then added a coat of HK Girl by Glisten & Glow. One coat of top coat would do the job, but I prefer it this way to avoid smudging the design.
Finally, apply some cuticle oil/butter and you’re all done!
I love how these turned out. These colors look great together, don’t you agree?
And here’s Grace, a gorgeous muted pink scattered holographic hue. I’m a huge fan of these kind of colors. It has lavender sheen to it but on the other hand it’s sparkly due to the holographic particles (no glitter!). I used three thin coats for full opacity and added one coat of top coat for extra shine. Keep in mind that I take my photo’s outdoors, in daylight (no sun!).
Got all excited to try the nail vinyls? They can be purchased from the website (international shipping available!). And you can also find them on Facebook and Instagram.
All polishes by piCture pOlish can be purchased from their website. For a list of international stockists, click here. Don’t forget to check out their every day deals here! And they can also be found on Facebook and Instagram.
Check out the works of arts by the other lovely bloggers that are, like me, so lucky to be part of this years event! Just click on the cute little blue guy below to view them:
Lastly, a huge thanks to piCture pOlish (and Linda, Nail Vinyls) for the huge honor to be part of this years Blog Fest!

 For this mani I started with two coats of Nymph (423/507) by El Corazon and topped it with one coat of fast drying top coat (HK Girl by Glisten & Glow).
 El Corazon polishes are currently on sale at Hypnotic Polish! The vinyls can be found here.


