Mermaid nails ft. El Corazon

Hello beauties!

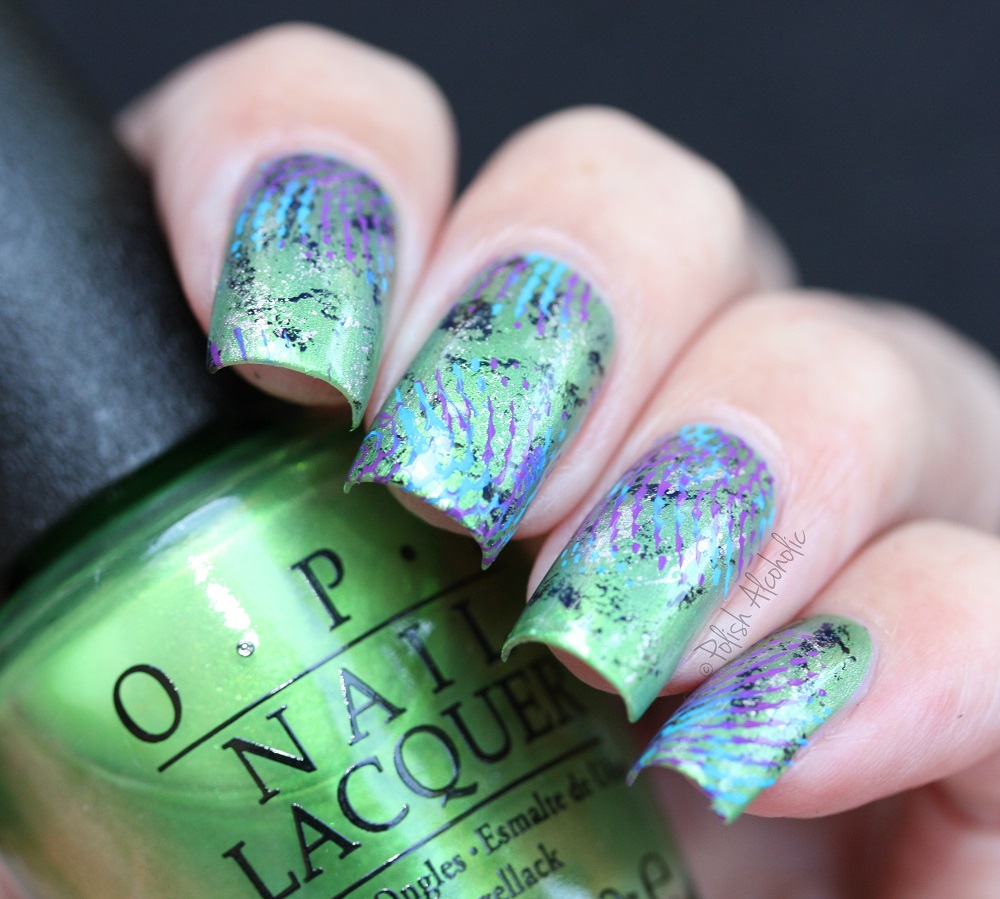
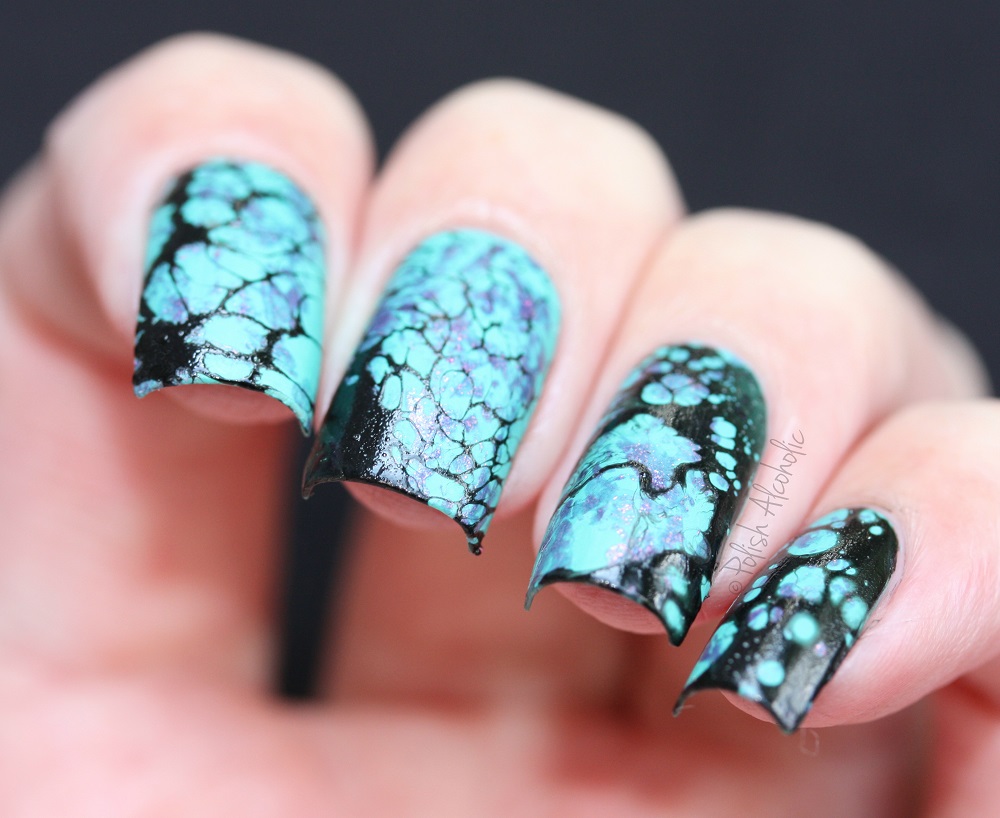
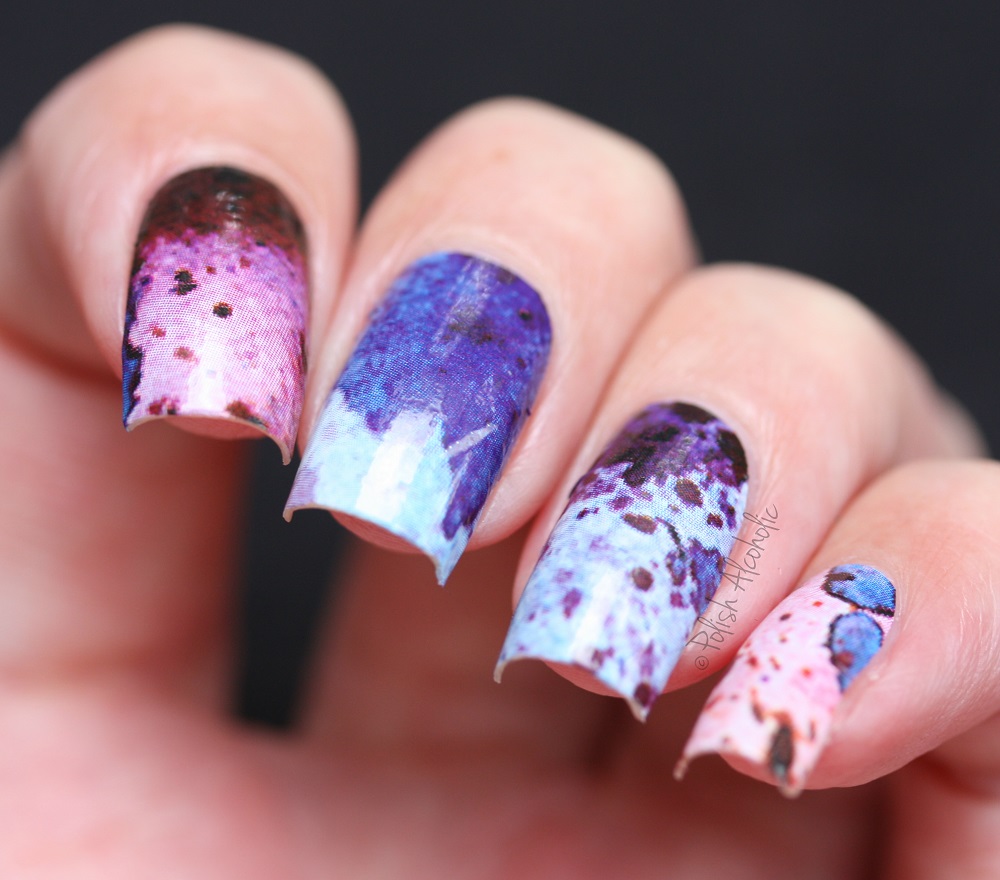
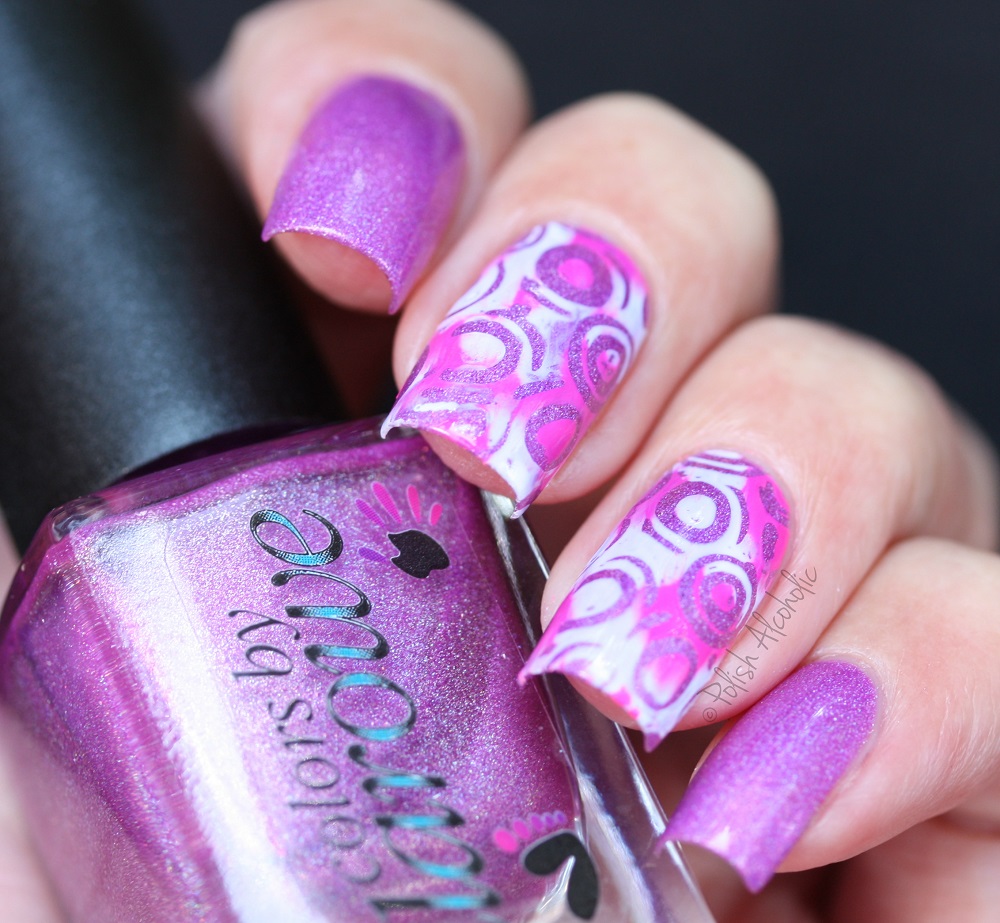
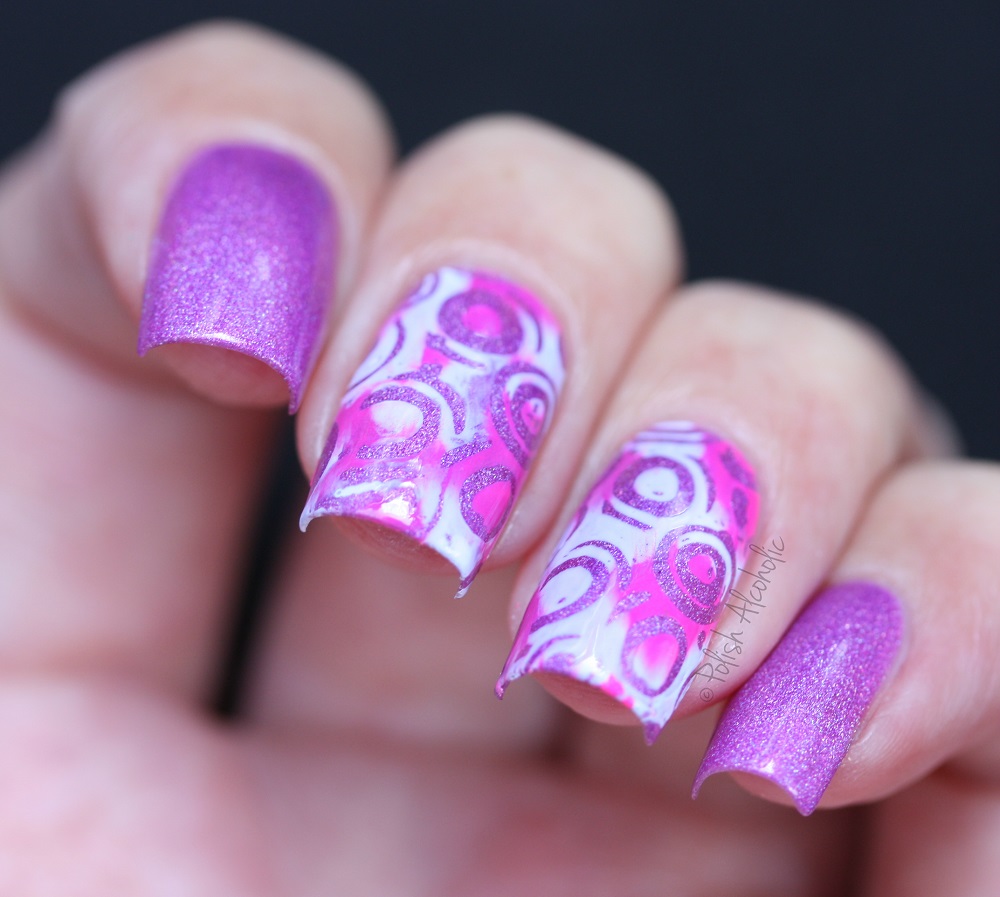
Have you tried nail vinyls yet? They’re so easy to use and gives a mani just a little bit extra. mermaid 250815 1
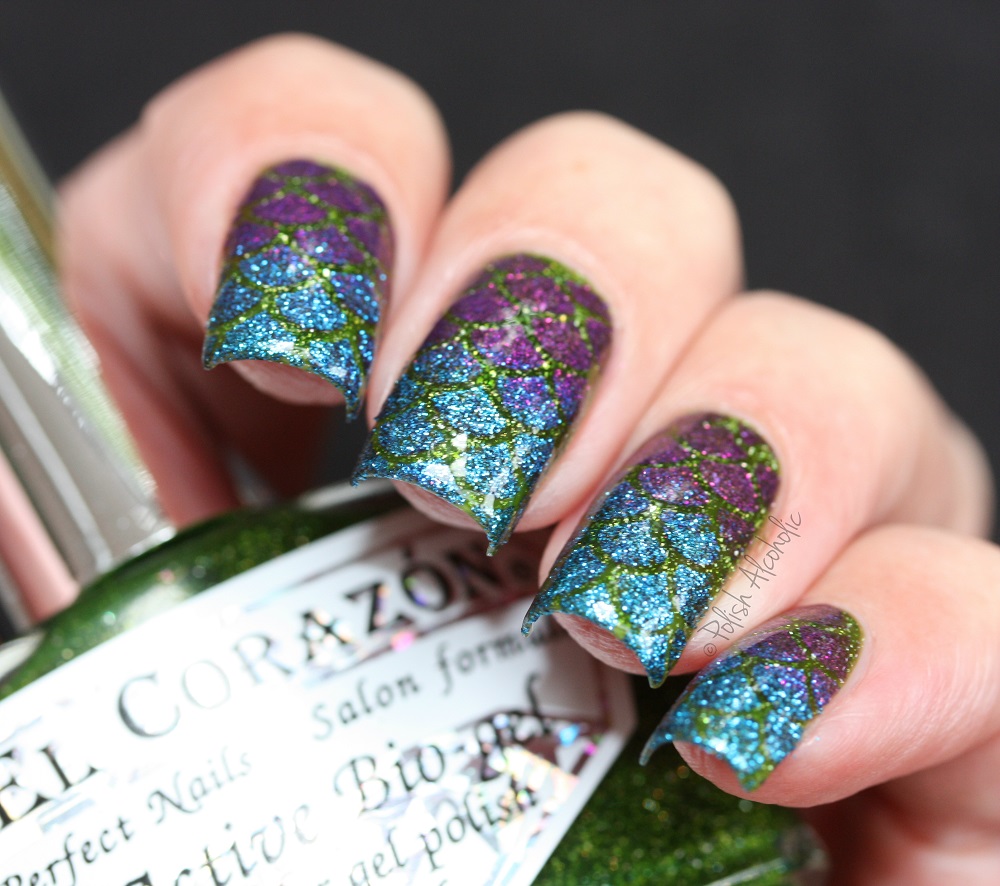
For this mani I started with two coats of Nymph (423/507) by El Corazon and topped it with one coat of fast drying top coat (HK Girl by Glisten & Glow).
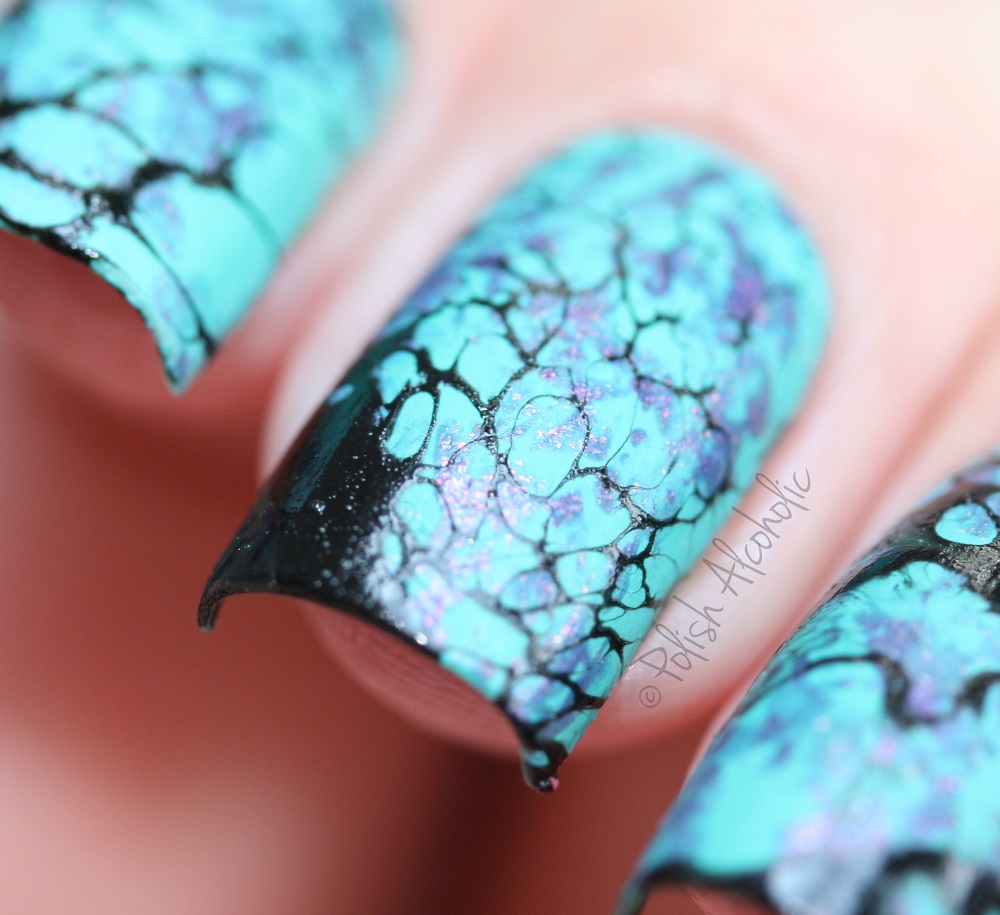
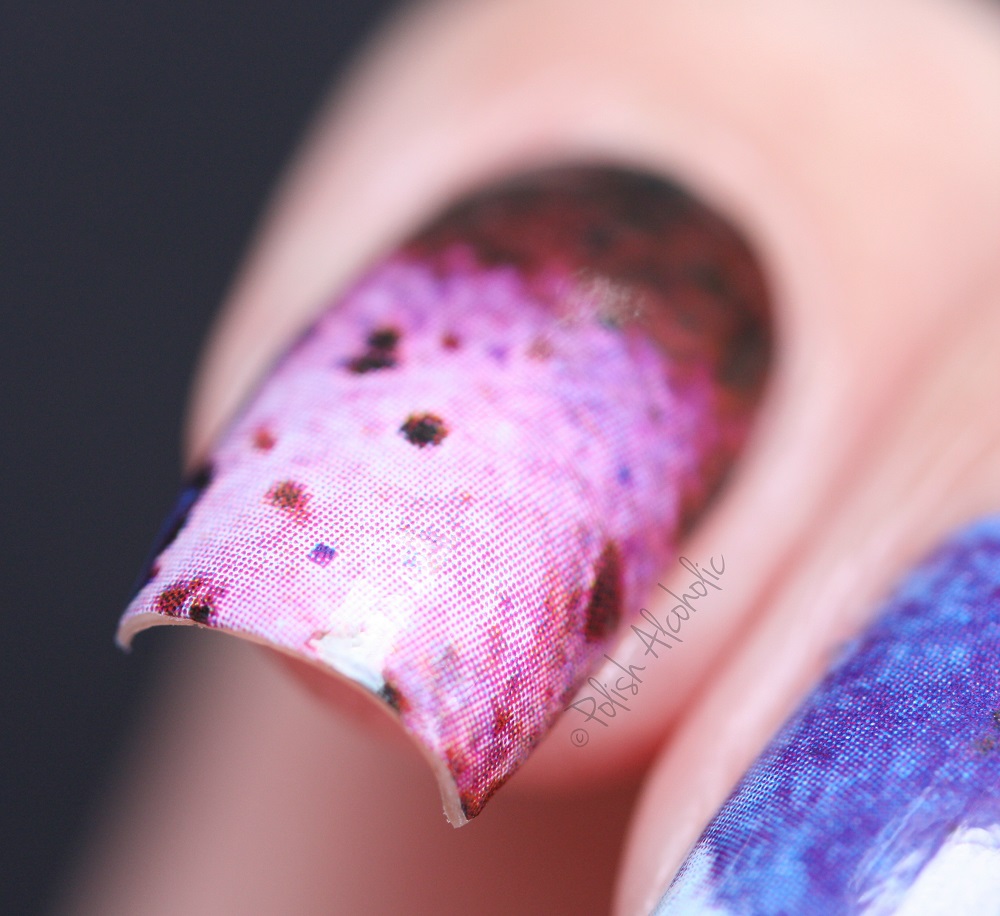
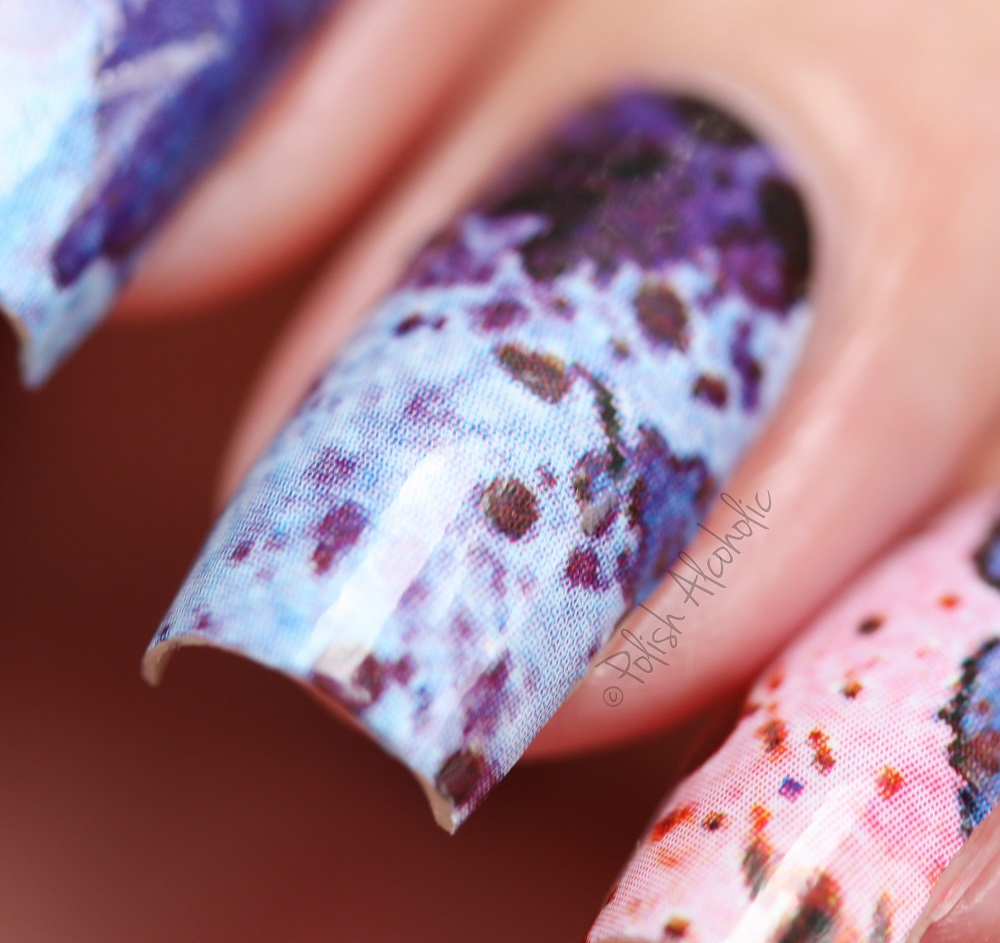
The mermaid scale vinyls are from What’s Up Nails. I used a make up sponge to apply the following polishes after I applied the vinyls: 509a, and Magic Attraction (423/554) by El Corazon. One coat of top coat and done! 🙂 mermaid 250815 2El Corazon polishes are currently on sale at Hypnotic Polish! The vinyls can be found here.

Thanks for stopping by! :*

“I don’t know what to call this” Nailart

Hi lovelies!

I’ve been paying around with color combinations and here’s the result:nailart 1208I have no clue what to call this but I think it turned out quite nice. For my base color I used My Gecko Does Tricks by OPI. Then I added bits of black (China Glaze: Liquid Leather) and gold (Essie: Good as Gold) by using a piece of make up sponge. For the stamping design I used MoYou Pro XL plate 20 and Turquoise and Purple stamping polish by Mundo de Unas. Lastly I applied one coat of my fave top coat HK Girl by Glisten & Glow.nailart 1208 1:*

Colorful water marble

Hi beauties!

I’ve been water marbling again. This time I didn’t create a certain pattern but instead I just did whatever came in my mind. Here’s the result:watermarble 0815 1Polishes used, all by OPI:
Big Apple Red
A Roll In The Hague
The IT Color
Forrest My Case
Can’t Find My Chechbook
Lost My Bikini In Molokini
Kiss Me I’m Brazilian

For my top coat I went with Electric Lane by Nails Inc.watermarble 0815 3Thanks for stopping by! :*

Happy Birthday Nailluminati!

Happy happy Birthday to my sweet friend Nailluminati!Nailluminati Birthday 2015

For this special day Becky had the greatest idea, create a food themed mani to show our Bday girl what an awesome woman she is! So lots of ladies joined forces and made a food themed mani.

Check out all the fantastic creations under #HappyBirthdayNailluminati on Instagram 🙂
darlene bday maniThese are supposed to be hamburgers which were a little different in my head than they turned out on my nails. I mean, have you ever seen hamburger buns with sesame seeds both on top AND the bottom? Yeah, me neither :p
Also, isn’t it obvious that I don’t have a proper brownish polish to represent the buns? So many polishes and not a single brown for this mani? I can hardly believe it myself. So I went with a grey-ish taupe since I used my two brown polishes for the hamburger.
For the cheese and lettuce I went with two different shades of green and yellow. The same goes for the hamburgers. darlene bday mani1And because I wasn’t quite sure of these I did another mani. This time it’s hotdogs 🙂

Hamburgers and hotdogs for my Bday girl! 🙂darlene bday mani2
Wishing you a fan freakin tastic day, D.! May you be spoiled rotten. Love ya girl! :*

And a special thanks to Becky for hosting all this!

Stone Marble Nail Art

Happy Friday lovelies!

I’ve been wanting to try the stone marble nail art technique for quite a while now and finally gave it a try. nailart 3107Looks quite difficult and messy, right? Well, it isn’t, believe me. I started with two coats of Macarena Mint by Essence, which dries to a chalky matte finish. Then I used a piece of saran wrap to add bits of La Vida Loca, also by Essence. Now the base is ready… let the fun begin 🙂

Preparation is the key! Recently I discovered a new to me liquid latex barrier and this was the first time I’ve tried it. It’s called Liquid Nail Art Tape and is made and sold by fellow blogger Helen a.k.a. BeautyIll. Read all about it here (Dutch). I’m not sure if she offers worldwide shipping at this time. I’ll be sharing a full review soon!

I used a small disposable cup filled with room temperature water and China Glaze‘s Liquid Leather for the stone marble design. The key ingredient to create this look is hairspray. Once the skin around my nails was prepared for the mess with the latex barrier I dropped 2 or 3 drops of the black polish in the cup with water. Then I sprayed once or twice directly above the cup with hairspray. The tricky part is dipping the nail in the cup. I’ve found that working as fast as you can gives the best result meaning: spray and immediately dip. Then pick up the excess of the polish with a q tip and slowly pull your finger out of the water. Peel off the latex barrier and you’re done. I didn’t use top coat here because of the matte look of my base color. nailart 3107 1It really is not as difficult as it looks. What do you think of these? Are you going to give it a try? If so please do share! I’d love to see your creations 🙂

Cirque: New Moon + Hatch

Hi beauties!

You can never go wrong with black and white, can you? For this mani I used a combo a grey, white and black polishes:cirque - new moon - hatch0For my index I applied two easy coats of New Moon by Cirque. My pinky shows three thin coats of Hatch, also by Cirque. The gradient on the nail of my ring finger is made with both New Moon and Hatch. And lastly I created a water marble design by using the same colors and added Cosmos (423/508) by El Corazon. For a smooth and shiny finish I applied one coat of top coat. cirque - new moon - hatch3I’m happy with the outcome of this sort of mix match 🙂 What do you think?cirque - new moon - hatch2:*

Sophin: 274 + 269 – Neon Sand Effect

Happy Friday!

Neon AND textured? Of course I needed to try that! sophin 269 2742For this mani I created a gradient effect with 269 (pink) and 274 (yellow), both from the Neon Sand Effect line by Sophin. This brand recently launched at Hypnotic Polish and is definitely worth checking out. There’s a wide range of colors and finishes available for a reasonable price. These polishes do not need a white base to get that bright neon effect. I used a make up sponge to apply the colors over just one coat of base coat.sophin 269 2741I used black stamping polish by Mundo De Unas and MoYou ProXl plate 04 for the butterfly wings. sophin 269 2743 Have a fabulous weekend!

ThumbsUp Nail Wraps: Rorschach

Not satisfied with your nail art skills or don’t have the time for it? ThumbsUp Nail Wraps might be perfect for you! And… they are currently on sale at Hypnotic Polishthumbs up rors chachA huge thanks to Maria for gifting this set to me. This design is called Rorschach. I love it and was surprised how easy it was to apply them. A pack contains 2 sheets with 10 nail wraps each in different sizes. I applied base coat to protect my nails and after that was dry I checked which designs fit my nails best. Then gently peel the design off the backing paper en place it on the nail. I used tweezers to apply them on my nails (one nail at a time). I’ve found that they worked best when firmly press them on the nail beginning in the middle and if needed gently stretch them towards the sides and press again. If they are in place, stretch them towards the tips of the nails and fold them over the free edge. Use a file to get rid of the excess and your done. The instructions say that you can apply gel top coat for a long lasting and glossy finish. I didn’t do that here since they are glossy by itself. I did apply my fave top coat (HK Girl by Glisten & Glow) on one nail to see if it worked. That caused the design to wrinkle and cracks started to show up. I don’t know if it’s the top coat that caused this but I felt the need to mention it. Obviously I re did that damaged design 🙂 Here’s a closer look to the individual designs:
Index:thumbs up1Middle:thumbs up3Ring:thumbs up2Have you tried nail wraps yet? What do you think of them?

Fan Brush Nail Art

Happy Friday lovelies!

I’ve been playing around with my fan brush plus a ton of rainbow colored polishes and here’s the result:opi - rainbow dry brush 2It’s sort of a distressed look but with finer lines and more colors I guess 🙂
I started with a white base and then applied the following polishes with a fan brush, all by OPI:
Big Apple Red (red)
A Roll In The Hague (orange)
The It Color (yellow)
Forrest My Case (green)
Can’t Find My Czechbook (blue)
Lost My Bikini In Molokini (purple)
Kiss Me I’m Brazilian (pink)

For top coat I went with Electric Lane by Nails Inc..opi - rainbow dry brush 3I’m happy with the outcome. What do you think of these?

Have a fabulous weekend! :*

Llarowe: My Own Private Paradise

Hi sweeties!

I’ve read great things about the Creative Shop stamper lately and decided to give it a try. I still need to get the hang of it since it’s quite big but so far so good. cbl - my own private paradise 3For this mani I used two coats of My Own Private Paradise by Llarowe as my base color. For the design I went with number 03 from the ProXL range by MoYou. And the stamping polishes are both by Mundo de Unas, 29 Neon Pink and 1 White. cbl - my own private paradise 1As for the stamping polish, I became a huge fan of Mundo de Unas. The only down sides in my opinion are the overwhelming smell and the fact that there are no mixing balls in the bottles which makes shaking difficult. I’ve read though that future batches do come with mixing beads which is a great plus since the polish is quite thick and therefore difficult to mix. I’ve ordered my latest bottles directly from their website. Since they’re based in Mexico it takes a long time to get here. I believe I’ve waited about 6 weeks for them to arrive. Then again, they’re totally worth the wait.cbl - my own private paradise - mdu 29 neon pink 1 white - moyou 03Thanks for stopping by! :*